How to Color Match Your ColorEdge Monitor and Photo Prints
Monitor Adjustment Continued - ColorNavigator

It’s important to adjust your monitor regularly
With continued use, monitors lose the ability to display colors correctly, causing them to become darker (dimming brightness) or change in hue (changing color temperature). To restore the monitor to its original state, it is necessary to readjust the settings.
|
|
||
| Correct display | Changes with use over time | Readjusting the monitor |
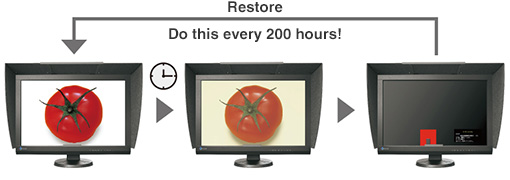
■How to automatically readjust
The latest ColorEdge models are equipped with a built-in sensor that will automatically readjust the monitor at regular intervals that you decide. The adjustment can be performed when the computer is off or when nobody is using it.
-
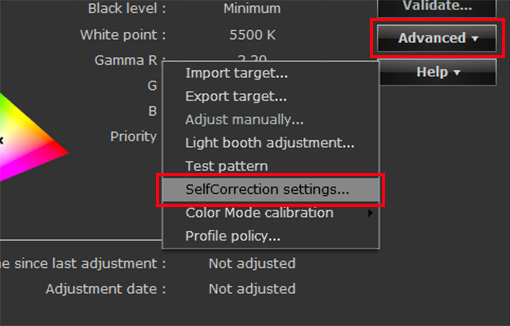
For the CX and CS Series
Select “SelfCorrection settings” from the Advanced drop-down menu.
-
For the CG Series
Select “SelfCalibration settings” from the Advanced drop-down menu.
-
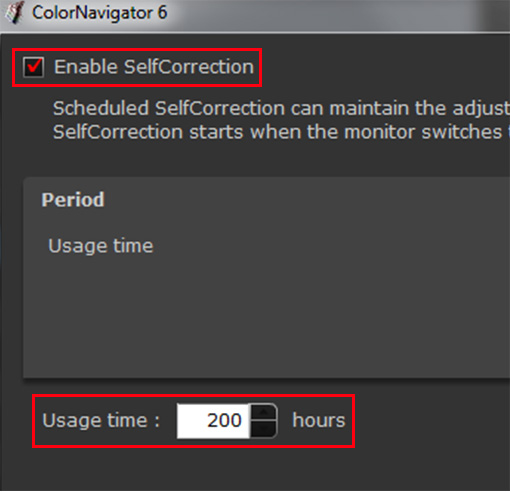
For the CX and CS Series
Check “Enable SelfCorrection”. Set the Usage time to the number of hours before readjustment.
-
For the CG Series
Check “Enable SelfCorrection”. You can set the timing in months, weeks, or elapsed time.
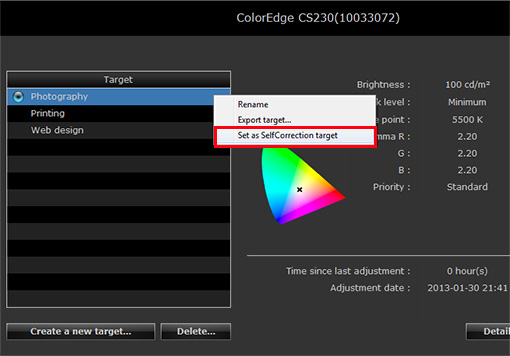
■How to choose target values for automatic readjustment
You can select up to 4 target values to be automatically adjusted. A ![]() mark will be displayed on the selected target value.
mark will be displayed on the selected target value.
-
For Mac
Hold down the control key, click on the adjustment target and select “Set as SelfCorrection target."
-
For Windows
Right click on Adjustment target and select “Set as SelfCorrection target."
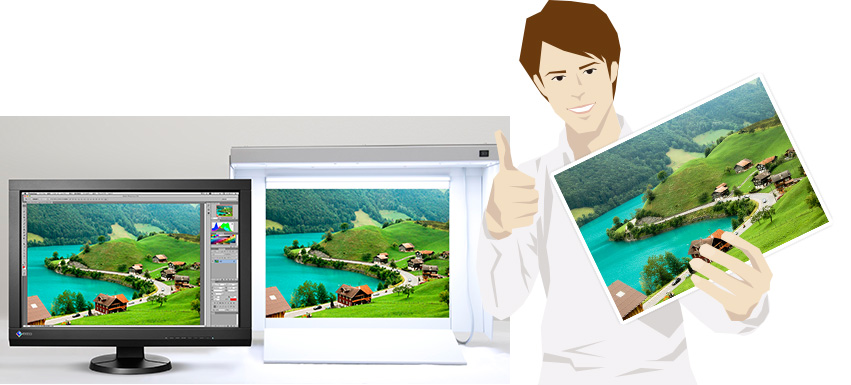
In this guide we have covered calibration, image retouching software settings, and printer settings. Now you can accurately match your photo prints and your computer monitor. Great work!
The following section is a step further towards accurate color matching for those who would like to learn more.
![Increase your matching precision [Monitor Adjustment] Using ColorNavigator color management software](http://www.eizo.com/global/library/management/matching/result/step_08_01.jpg)
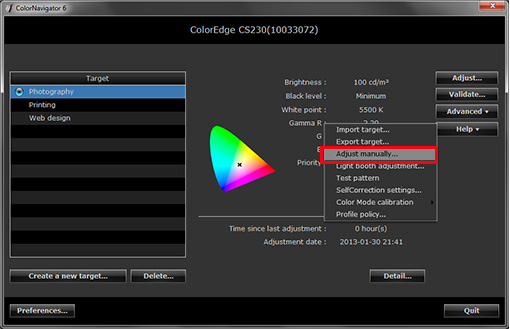
1. Manual Adjustment
Select “Adjust manually” under the Advanced drop-down menu on the right side of the screen.
This is a fine-tuning function that adjusts the target values even further.
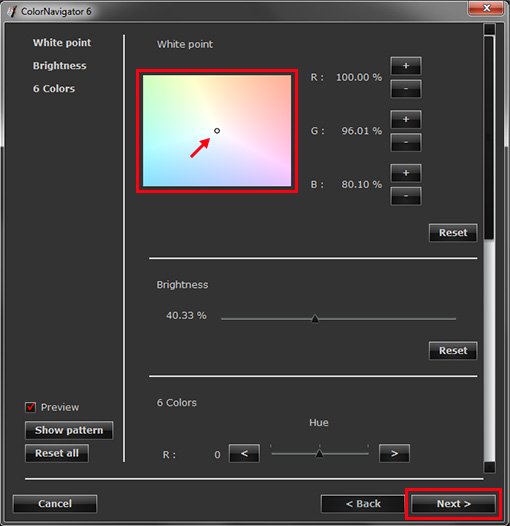
2. Brightness Adjustment
Adjust the screen luminance (Brightness) until it approximates the appearance of your photo print.
If the screen is darker than the print, move the cursor to the right.
|
|
|
|
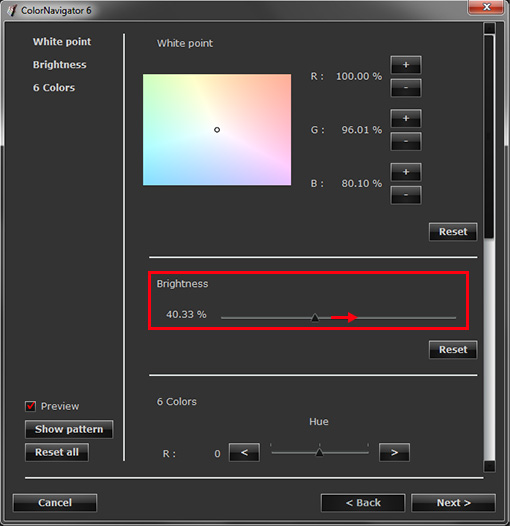
3. White Point Adjustment
Next, adjust the screen color tone (White point) until it approximates the appearance of the photo print.
If the screen seems blue, move the pointer away from the blue and towards the yellow to remove excess blue.
|
|
|
|
| When you have matched the colors, click “Next.” |
-
Adjusting colors individually can have a large influence on how other colors appear so avoid moving the slider labeled “6 Colors” at the bottom when doing general color matching.
If your color matching environment is properly prepared, you can match colors with brightness and white point.
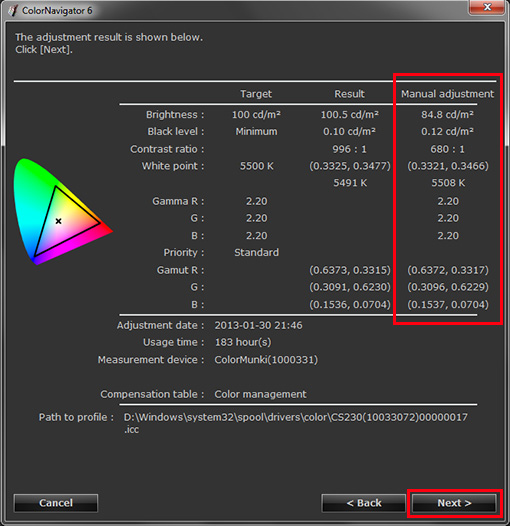
4. Calibration
To fine-tune the adjustment results, use the same calibration sensor you used earlier in this guide.
When the adjustment results are displayed, click “Next”.
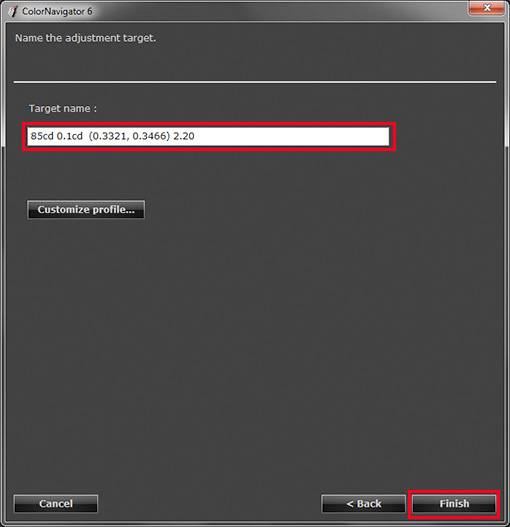
Create a new target name and click “Finish”.
|
|
The new adjustment targets are added to the target list. Now the calibration is complete. |

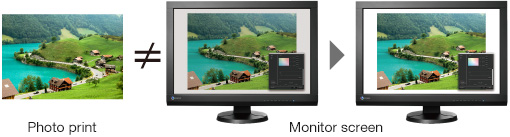
5. Confirmation
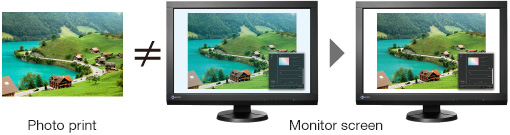
Compare your photo print with your screen a second time.
When the manual adjustment is successful, the colors of your photo print and monitor will match even more closely.
This concludes our guide.
Great work!
- You can use the above map to return to any section of this guide.